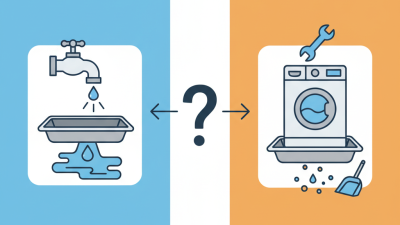
A containment tray is a simple piece of equipment with an important job: catching leaks, drips, or small spills before they spread. You may see one beneath a chemical container, a maintenance drum, or equipment with fluid-filled parts. The raised edges hold liquid in a defined area, making leaks easier to notice and cleanup more manageable. Small details matter. A tray that is too shallow, poorly placed, or made from an incompatible material may not provide the protection you expect.
For transparency, the following is an illustrative quote, not a verified statement from a real expert. Containment specialist Jordan Lee puts the practical idea this way: “A tray is a backup barrier, not a substitute for checking containers and planning for spills.” That distinction matters. A containment tray can support routine storage and handling, but its suitability depends on the liquid, container size, tray capacity, and working conditions. Check the manufacturer’s specifications, inspect the tray for cracks or damage, and keep it accessible for routine checks. No tray solves every problem. This guide explains common uses, how to choose a suitable tray, and what to consider when placing and maintaining one. It also recognizes a limitation worth keeping in mind: even careful setup can miss changing risks, so review the arrangement when materials, equipment, or workflows change.
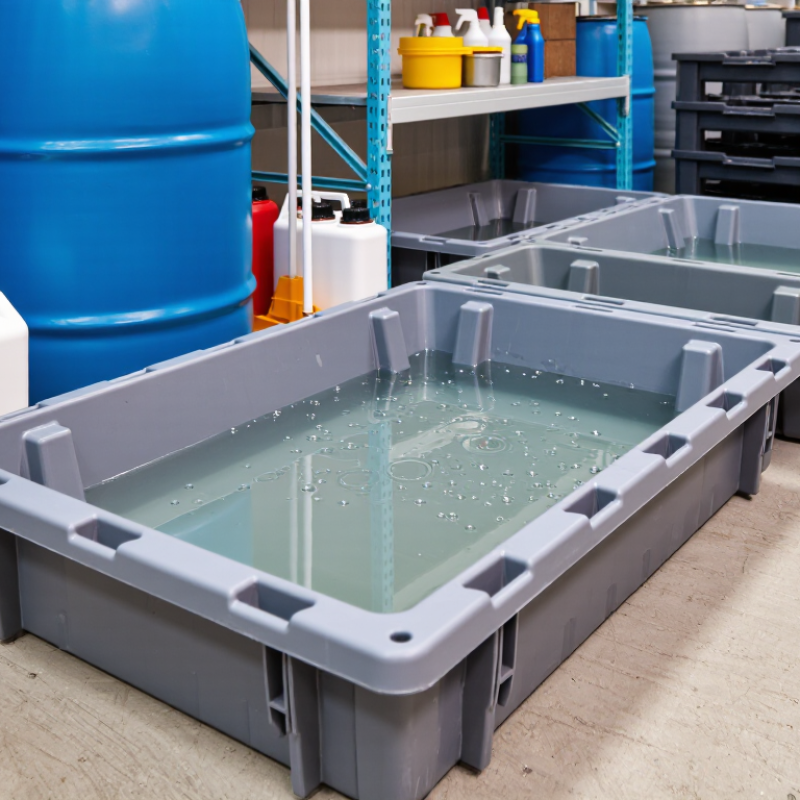
A containment tray is a passive barrier placed beneath equipment, containers, or transfer points. Its main job is to catch drips and small leaks before they spread across a floor. The tray does not stop a leak. It limits where escaped liquid can go. That distinction matters.
Most trays work through gravity and a raised edge. Liquid from a loose fitting or container collects in the basin instead of running outward. Some designs include a drain, removable grate, or absorbent insert, but these features do not replace routine inspection. Check for pooled liquid, cracks, corrosion, or residue after use. Small signs count.
Capacity is part of the operating principle. The tray must hold the likely spill volume without overflowing, and its material must suit the liquid and conditions. For example, a tray under a pump should sit level and close enough to catch drips from seals and hose connections. Placement is easy to get slightly wrong; an offset tray may miss a leak entirely. After a spill, clean the tray according to the liquid’s handling guidance, since residue can hide later leaks.
A containment tray captures leaks before they reach the floor, a drain, or nearby equipment. Its shallow, rigid basin sits beneath drums, pumps, batteries, or chemical containers. When a fitting drips, liquid collects in the tray instead of spreading across a work area. That small barrier can make cleanup faster and reduce slip hazards. Details matter: check the tray’s capacity, material compatibility, and condition before use.
For oil storage, U.S. EPA rules in 40 CFR 112.8(c)(2) call for secondary containment able to hold the largest single container, with extra room for rainfall. This is a useful design reference, not a universal capacity rule for every workplace. A tray holding a 200-liter drum, for example, needs enough usable volume for the likely spill and any required allowance. Keep it level, inspect for cracks, and remove collected liquid promptly. Easy to miss. A tray can also overflow if rainwater or repeated small leaks go unnoticed. I would not treat it as a substitute for checking hoses and valves; containment buys time, but it does not stop the leak.
A containment tray catches and holds leaks or spills, helping keep liquids from spreading onto floors or surrounding areas.
These examples show theoretical capacity based on tray dimensions and a six-inch wall height. Actual usable capacity may be lower because of equipment inside the tray, freeboard, and the tray’s design.
Containment trays catch leaks beneath drums, chemical bottles, pumps, and battery-charging equipment. In workshops, a shallow tray can collect oil drips under a service cart before they reach the floor. In laboratories, compatible trays help keep small reagent leaks contained near storage shelves. Warehouses use larger models beneath liquid containers or transfer points. The right size depends on the container, the liquid, and the likely spill volume.
These are practical controls, not just housekeeping. The US EPA’s 2022 Toxics Release Inventory National Analysis reported that facilities managed 21.3 billion pounds of production-related waste that year. The figure includes more than liquids, and it does not represent every workplace. Still, it shows the scale of industrial material handling. For outdoor oil storage, EPA’s SPCC rule specifies secondary containment sized for the largest container plus precipitation (40 CFR 112.7(c)). A tray may support that control, but capacity and placement matter.
Not foolproof. A cracked tray, blocked drain, or incompatible material can undermine containment. Staff should check trays during routine inspections and clean spills promptly, using procedures suited to the liquid. An awkward detail: trays can also obstruct access if placed carelessly. Keep them stable, visible, and clear of walkways.
| Workplace or Industry | Common Use | Material or Liquid Contained | How the Tray Helps | Typical Placement |
|---|---|---|---|---|
| Manufacturing and maintenance | Catch drips during equipment servicing or fluid transfer | Lubricating oil, hydraulic fluid, or coolant | Collects small leaks and drips before they reach floors or drains | Under pumps, machinery, or service points |
| Automotive workshops | Capture fluids during vehicle maintenance | Engine oil, transmission fluid, or antifreeze | Helps keep work areas cleaner and makes collected fluid easier to manage | Under vehicles, fluid containers, or workbenches |
| Laboratories | Provide secondary containment for bottles and small containers | Laboratory chemicals, reagents, or cleaning solutions | Helps contain leaks or spills from stored containers; tray material should be compatible with the chemical | Inside cabinets or beneath chemical storage shelves |
| Warehousing and distribution | Contain leaks from stored liquid containers | Cleaning products, oils, or other packaged liquids | Limits the spread of a leak around a storage area while it is addressed | Under shelving or designated storage locations |
| Agriculture | Catch drips when handling or storing liquid products | Fuels, lubricants, or agricultural chemicals | Provides a catch surface around containers and transfer points | Near equipment, storage containers, or mixing areas |
| Battery charging and service areas | Contain potential leakage beneath batteries | Battery electrolyte, where compatible materials are used | Helps prevent leaked liquid from contacting nearby surfaces | Under batteries or battery service stations |
| Food processing and commercial kitchens | Catch drips from containers or equipment | Cooking oil, water, or cleaning solutions | Supports housekeeping by collecting leaks in areas where liquids are handled | Under dispensers, containers, or service equipment |
| Construction and field operations | Provide localized containment during equipment use or maintenance | Fuel, hydraulic fluid, or lubricants | Helps keep drips contained at temporary work locations | Under stationary equipment or fluid containers |
A containment tray catches leaks beneath drums, tanks, or equipment, but its stated capacity is not always its usable capacity. Wall height, floor area, and the shape of the corners determine how much liquid it can hold. A shallow tray may look wide, yet a low rim can limit its volume. Grates also take up space, so check whether the listed capacity accounts for them. Small detail. It matters.
Material and construction affect performance, too. Chemical compatibility, seams, and tray support help prevent leaks or sagging under a full load. In U.S. hazardous-waste container storage areas, EPA regulation 40 CFR 264.175 specifies containment capacity of at least 10% of the total container volume or the largest container’s volume, whichever is greater; precipitation must also be considered. This requirement applies to those regulated areas, not every tray. Actual site conditions can complicate the calculation.
Tips: Measure the tray’s interior dimensions, not just its outside footprint. Check capacity with grates installed, and allow room for rainwater where relevant. For example, a tray beneath four drums should be assessed against both their combined volume and the largest drum. Then compare the result with applicable site requirements. It is easy to assume “rated capacity” means working capacity; that assumption deserves a second look.
A containment tray sits beneath drums, jugs, or equipment to catch leaks and drips before they spread across a floor. Choosing one starts with the liquid involved. Check the tray material against the liquid’s compatibility and temperature guidance; a sturdy-looking surface is not proof that it will resist damage. Small details matter.
Size the tray for the containers it will hold, while leaving enough room to place and remove them safely. Estimate the potential spill volume and check applicable workplace requirements. Capacity alone is not enough: a tray that blocks access or is difficult to inspect may be a poor fit. It is easy to focus on the largest option and overlook daily handling. I would reconsider that choice.
Keep the tray visible and accessible. Inspect it regularly for cracks, warping, residue, or standing liquid, and clean it using a method suited to the material and spill. Dry it before putting containers back. Do not guess. Follow the supplier’s care and load guidance, and replace a damaged tray rather than relying on a quick patch. Record inspections if your site procedures call for them; a simple note can reveal recurring leaks.